 So, I went searching the web for ideas on what to do with my headbands. I got this really great idea from my FAV plus size fashionista, TheStyleSupreme, on youtube (you guys gotta check her out!) She came up with the idea of taking oatmeal cans and decorating them! Here is her video on her headband holders that she made; http://www.youtube.com/watch?v=0fd5JZnrHyQ. This inspired me to make my own headband holders So, I went to the dollar tree (man I love me some dollar tree), and was able to purchase absolutely everything I needed for my little crafty project for under $10!! As you can imagine I was personally stoked. If you want to know how I made my very own headband holders then stick around, and read on down.... (hey that rhymed)
 Here's what you're going to need...

Some wrapping paper (or fabric, or shelf liner, anything will work, as long as it's wide enough to to cover the length of the can)
Tacky Glue
Ribbon
and something to decorate the cans with. ( At the dollar tree, in the home good section they have these awesome wall stickers. They are large and in charge. So, I got 2 different patterns. They have several to choose from. )
Now for the procedure...


Next, your going to need to measure out the width of the can and mark it on the paper, as well as the length of paper it will take to cover the can.

After you have your piece of paper cut out, if it is not self sticking, then you are going to use the tacky glue to adhere the paper (or fabric) to the can. (I didn't take a pic of this because I forgot.... sorry) I have found, to prevent the paper from getting that wet look from the sections of glue, that one strip of tacky glue along the length can for the first half of the paper, and one strip along top of the paper where they meet will hold the paper on just fine, as well as prevent the "glue" look.
OK, next you are going to want to tuck in the ends around the bottom and top.

I used a glue stick to run along the inside of the can, and then fold down the edges.
Alright, now can decorate your little can.


**ooooo.... ahhhhh....**

Then I added my stickers. I ended up putting 4 on all together.
(I love frogs.... and peace....)
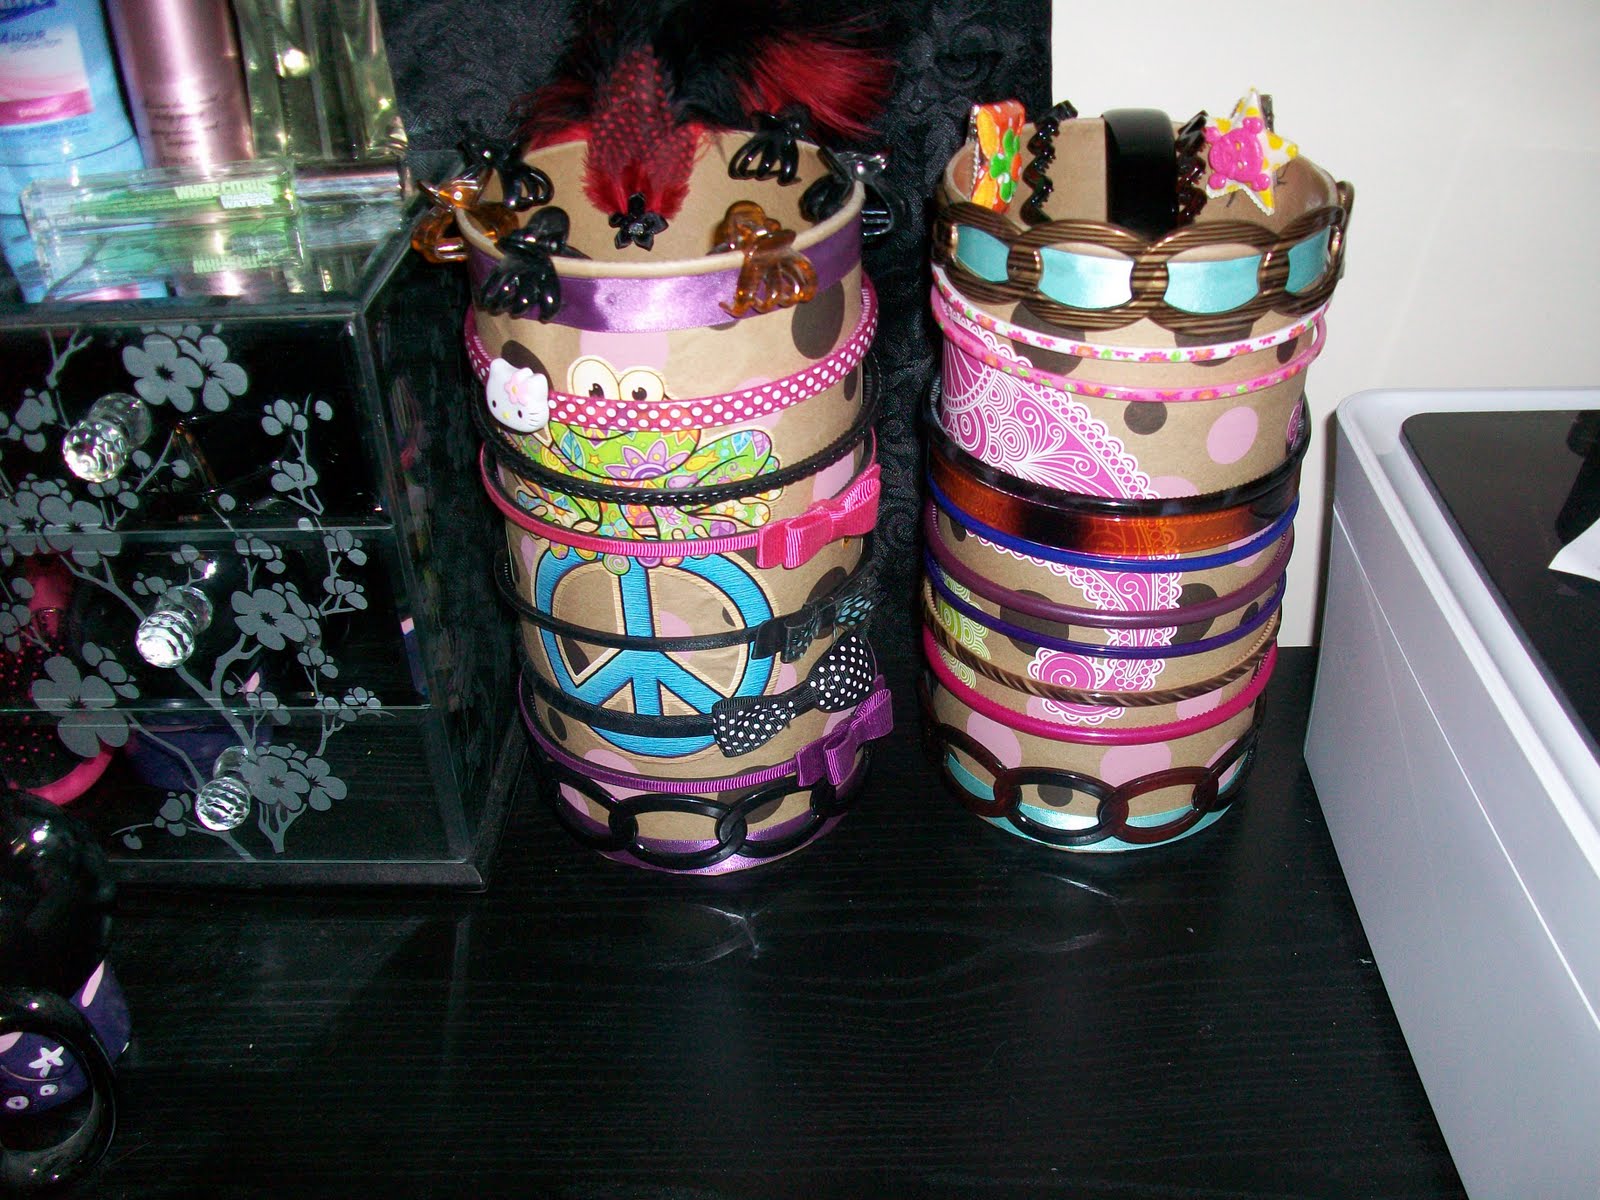
OK, that's it, here's the finished product...

I had added that flower. Then later decided against it.
I hope you guys enjoyed this little crafty project, and try it for yourselves.... Leave me a comment or a pic of yours if you try it.
Talk to you guys later
Jen
**PS - let me know if there are any products that you would like me to review, or tutorials that you are interested in.**
No comments:
Post a Comment